(This article comes from our friends at GuitarTricks.com – check out their site for tons of guitar-related tips and tricks!!)
How To Get The Most Out Of Your Pedals
By Steven Kendzorski for Guitar Tricks and 30 Day Singer, the original platform for online guitar lessons.
I have GAS, and it’s bad.
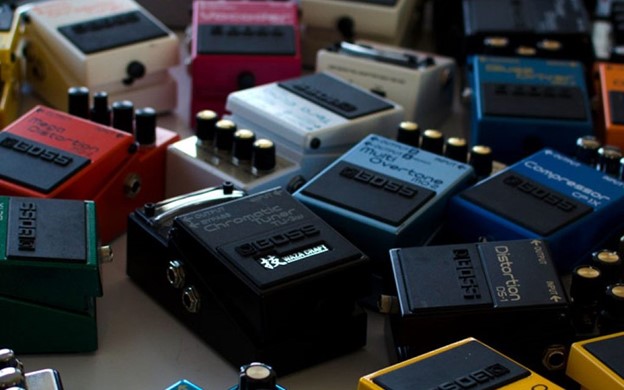
GAS (Gear Acquisition Syndrome) is a common ailment among new guitar players, triggered by tone-envy, causing them to spend every spare dollar on guitars, amps, and most often, effects pedals! I first discovered the joy of electric guitar playing when I was 15 and began to learn guitar during Summer Break. I probably purchased 20 effects pedals during those three months, bought ‘used’ at the local mom-and-pop music shop down the block. These pedals were affordable and provided the tonal inspiration I needed to keep me excited about playing.
I started with distortion and overdrive pedals. I saw Kurt Cobain using a BOSS OD-1 Over Drive while slamming some barre chords in a live concert video and I snatched one up. I read in Guitar Player Magazine that Stevie Ray Vaughan used only a single overdrive pedal to achieve his signature tone: the Ibanez Tube Screamer. I had to have it. At a pawn shop, I traded my Nintendo64 for a Wampler EQ and a cheap compression pedal. I soon graduated to atmospheric effects, like Delay, Reverb, Chorus, Wah, Tremolo and Flanger.
Still, after acquiring all of these pedals, my tone was trash. Stomping on my distortion pedal, my ears were assaulted with untamed feedback. With delay and reverb, the echoing was so cavernous that I couldn’t even really make out the beginner guitar lessons I was learning. The problem I was having wasn’t a lack of pedals, but rather a lack of understanding how to arrange them and, more importantly, how to dial them in while I was learning to play guitar.
So, let’s dive right in and take a look at how to get the most out of the pedals you already own. We’ll start with how to order them, and then we’ll get into the nitty gritty about how to understand and manipulate knobs.
The Order of Things
How we organize our pedals in sequence is called the Effect Signal Chain. Effects pedals come in 4 umbrella categories, Equalization, Modulation, Time, and Compression, and should be arranged in this order. Meaning, when your instrument cable leaves your guitar, it should plug first into an EQ, then modulation pedals, then time effects and, lastly, compression, before heading to the amp.
(Please note: Tuning pedals do not affect our tone and can go anywhere in the chain. I put mine first so I never have to bypass other effects in order to tune.)
Equalization (EQ) pedals are the most vital tools for tone shaping, yet they are the most underrated. An EQ pedal at the beginning of your chain gives you the power to shape your fundamental tone BEFORE the signal goes anywhere else. EQ pedals can be used to exaggerate pleasing frequencies and also to dimmish any undesirable ones.
Next in the chain should be all of our modulation pedals (like distortion, overdrive, wah, fuzz, chorus, tremolo, flanger and phaser) These pedals are the most popular and have the most impact on the uniqueness of a tone. They manipulate our guitar’s timbre, or the “personality and quality of a musical sound”.
Time effects (like delay, reverb, echo) lengthen our sound. Reverb, for example, gives the impression of sound reflecting off the walls of a large hall. Delay pedals repeat back what we play verbatim, often with diminishing volume (kind of like shouting into a canyon and hearing your voice bounce back) Time effects are essential for adding atmosphere and drama.
Compression pedals should come last, as their purpose is to tame our tone. Compression literally makes quiet-sounds-louder and loud-sounds-quieter. Think of compression as a tool to balance your overall tone. Compression is the “secret ingredient” of saturated tone.
Now that you know how to order your pedals, let’s talk about how to dial them in.
Let’s Twist Again
Knobs were made to be twisted, and there’s a reason most effects pedals have them. Let’s take a look at the most common pedal dials, and how we can manipulate them to better achieve our ideal sound.
LEVEL (AKA Volume)
This one is pretty straight forward. Level knobs adjust the volume of the effect. This allows you to create volume differentiations between effects.
TONE (AKA Shape, Character)
This is also familiar, as it is similar to a tone knob on your guitar. A tone knob allows us to adjust the tone from thin (when set low), full (when set middle), to a fat tone (when set high). Tone knobs adjust how cool or warm the effect sounds.
PRESENCE (AKA Shimmer)
Similar to tone, this knob pinpoints and promotes an attractive high frequency (usually around 3khz). This parameter is VERY NUANCED. Even when all the way up, presence is “felt, not heard”. Meaning, we can tell the sound is a bit more sparkly, the difference is not dramatic.
GAIN (AKA Drive, Overdrive, Distortion, Intensity)
This adjusts how distorted, or “electrified”, the effect sounds. On overdrive and distortion pedals, high gain results in “crunchy”, highly-saturated drive. What does gain sound like turned all the way up? Metallica, Pantera and Joe Satriani kick into this gear quite often. However, too much gain promotes annoying feedback, so be careful! A medium amount of gain gives a “crunchy” tone, closer to Green Day or Black Sabbath. Blues players prefer medium to low gain, as it allows the effect to respond to the intensity of the performance. Meaning, striking notes firmly causes the effect to distort more intensely, while softer playing elicits a gentler, albeit edgy, tone. Low gain is great for rock rhythm, or when you want to “excite” a lead without overly-magnifying the signal.
RATE (AKA Repeat, Repeat Rate)
Usually found on time effects, like Delay, but also sometimes seen on Tremolo and Chorus pedals. Rate is the amount of repeats the effect will generate. On a delay pedal, setting the rate all the way up is almost never a good idea. The more an effect repeats, the harder it becomes to discern the notes themselves. A good method is to begin with a low setting, and increase the rate slowly until you achieve the desired amount of saturation.
DECAY (AKA Ratio, Time, Feedback, Sustain)
Decay is the amount of time an effect lingers after sound is produced. For example, on a Reverb pedal, setting the decay low would give the impression of playing in a small room, as we would only hear a small amount of reverberation. Setting the decay high would give us a much longer, cavernous reverb. Similar to the rate knob, the best approach is to begin low and increase until the desired level of saturation has been achieved.
TIME (AKA speed, depth)
A time knob controls how often an effect cycles. For example, on a chorus or tremolo pedal, setting the time high creates a wobbly, “underwater” effect that’s great for certain emotional musical goals, like funky solos, but definitely is an acquired taste. Setting the time low can give a “shimmer” of the effect, and is great for rhythm playing.
MIX (AKA Ratio, Wet, Wet/Dry)
This knob determines how loud the effect is, in comparison to the primary signal. Setting the mix all the way up on most pedals is not a good idea. For example, if we set the mix all the way up on a reverb pedal, we would only hear the reflected sound and not the initial sound we produce. Very strange. Start right in the middle with this one and you’re usually in a good place. Then you can adjust by taste from there.
EQUALIZATION KNOBS/EQ BANDS (typically only found on EQ pedals)
These come in two forms. Some EQ pedals simply have LOW, MIDDLE and HIGH frequency knobs which we would adjust just like we would on most amplifiers. Most EQ pedals, however, have a frequency band that allows more surgical tone adjustments. For example, BOSS Equalizer pedals have a 7 band EQ, ranging from 100hz to 6.4khz. This is the pedal that is MOST IMPORTANT to experiment with, as it is the strongest arbiter of tone. To get a full sound, great for clean or distorted rhythms, arrange the band in the shape of a smile. To get a boxier sound, great for punk rock and country, form the band into a frown. EQ pedals can also function as volume boosts, if you leave the band flat and increase the volume on the pedal.
Experimentation = Tone Realization
Now that you have a better understanding of how to set up your pedals and dial them in, don’t forget the first rule of tone exploration: Experimentation is the vessel that will carry you to marvelous tone. If you get lost, use your ears and not your eyes to set your pedals. Don’t forget that YOU, ultimately, decide what “perfect tone” sounds like!
I wish you the best of luck, and hopefully, some GAS-relief!
________________________

GET EXCLUSIVE UPDATES, CONTEST INFO, SEE OUR LATEST DEMO VIDEOS AND MORE:


August 16, 2022
Overdrive and fuzz are not modulation.
Compressor after reverb and delay? I don’t think so…
August 16, 2022
That’s what’s fun about pedals: there’s no wrong way to do it!! Experimentation is key!!